6.1 INTRODUCTION TO RUNTIME OBJECT METHOD
The Java runtime object method is to develop and build database-accessing operations using run-time Java code without touching JPA Wizards and Entity classes. In other words, no object-to-relational database mapping is needed, and the project can directly access the database using Java code.
As we discussed in Chapter 4, to access a database to perform a data query, the following opera-tional sequence should be followed:
1) Load and register the database driver using the DriverManager class and Driver methods.
2) Establish a database connection using the Connection object.
3) Create a data query statement using the createStatement() method.
4) Execute the data query statement using the executeQuery() method.
5) Retrieve the queried result using the ResultSet object.
6) Close the statement and connection using the close() method.
In the following sections, we will use some example projects, such as OracleSelectFaculty, to illustrate how to use the Java runtime object method to develop and build database query proj-ects to access Oracle databases. To make these developments easy, we still use NetBeans 12 as our development IDE.
6.2 CONNECT TO THE ORACLE DATABASE 18C EXPRESS EDITION CSE_DEPT
The first thing we need to do is download an Oracle JDBC thin driver, since we need this driver to connect to our sample database, CSE _ DEPT.
The Oracle JDBC thin driver is a Type IV JDBC driver, meaning that it is platform independent and does not require any extra Oracle software on the client side to interact with an Oracle database. So you can download the JAR file containing the classes of an appropriate thin driver version from the JDBC Driver Downloads page and then install the driver on your machine without having to install and upgrade any other Oracle software.
Refer to Appendix H to finish the download and installation process for the JDBC Driver for Oracle Database 18c XE. The downloaded driver, ojdbc8.jar, should be located in the C:\Temp folder on our machine (copy the downloaded driver file, ojdbc8.jar, to that folder).
There are two ways to make this database connection; one way is to use the Services window in the Apache NetBeans IDE 12 environment, and the other is to use Java code to make that con-nection in real time during the project development stage later.
Now let’s use the first way to test and confirm the database connection process. The second way will be built later when we build our database query project.
Perform the following operations to set up the database connection:
1) Launch Apache NetBeans IDE 12 to open its Start Page.
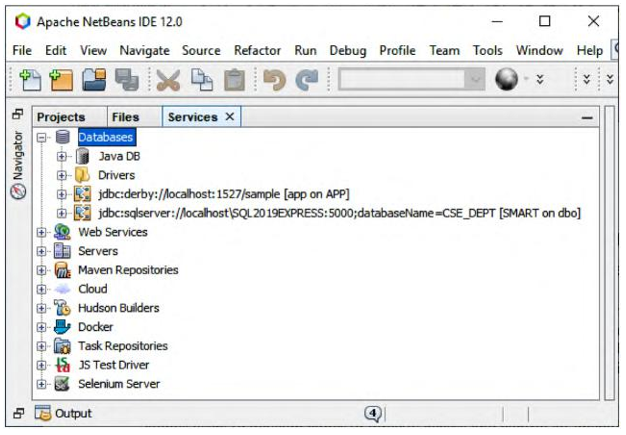
2) Click on the Services tab to open the Services window shown in Figure 6.1.
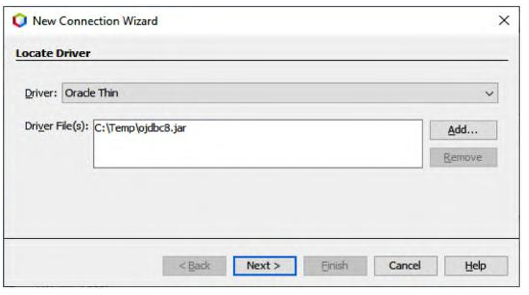
3) Right-click on the Databases icon and select the New Connection menu item to open the New Connection Wizard, which is shown in Figure 6.2.

FIGURE 6.1 The opened Services window.

FIGURE 6.2 The opened New Connection Wizard.

FIGURE 6.3 The sample database connection parameters.
